Szymon Rodzeń
-
Jun 17, 2024
-
16 min read
AI image generators in a nutshell
Generative AI, notably OpenAI’s ChatGPT, has changed how we generate content. Its latest version, with an added enhancement of the DALL-E 3 image generator, performs remarkably well in that area, mostly because it’s capable of comprehending natural human language.
Still, achieving desired results often involves a trial-and-error approach. Other subscription-based services, like MidJourney, also require a lot of work to produce exactly what we have in mind. And as with all closed-source, paid tools, they don’t allow for full control over the image generation process. Sure, the results of using such tools might be sufficient at first glance, but some of us might find their limitations too restrictive.
For those seeking a more independent route, Stable Diffusion is the way to go. It’s an open-source alternative that allows users to create images offline and for free, bypassing the limitations of external generators. Although it requires a little more technical knowledge than using DALL-E 3 or MidJourney, learning it might lead to a much better outcome.
What’s Stable Diffusion anyway?
Stable Diffusion, or SD, is a text-to-image model, just like DALL-E 3 and MidJourney. The main difference is that everybody can use it, and the only requirement is owning at least reasonably modern hardware. Starting in 2022, SD soon became a prodigy child of a company called Stability AI, but the project began at Munich’s Maximilian University. Nowadays, with an extremely active community, Stable Diffusion is one of the most diverse tools in the generative AI world. Its open-source nature encourages experimenting and developing custom SD-based models. Every major Stable Diffusion release serves as the foundation for hundreds of alternatives created by dedicated community members. This way. SD can meet even the most challenging requirements. There are models capable of generating images in one particular style and models that aim to be as wide as possible, offering a wide customisation range.
Will Stable Diffusion 3 be a game-changer?
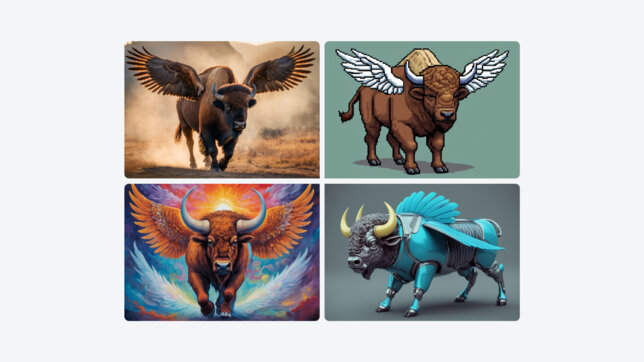
The next Stable Diffusion version, labelled simply “3,” aims to propel the project to previously inaccessible heights. It understands natural human language much better, can reliably put a correct caption on the image, and better differentiates between objects you mention in your prompt. By addressing those issues, SD3 strives to fulfil the goal of fixing the problems that haunt AI image generation. One of its most impressive feats is the ability to generate images from complex prompts. Do you want to generate an abstract scene with multiple distinct details that don’t influence each other? No problem, Stable Diffusion 3 has got you covered.
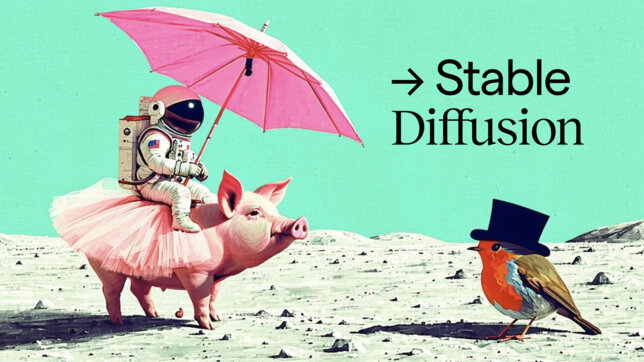
The above example, taken from Stability AI’s Twitter, is obviously cherry-picked, but it shows how well their newest model differs from other products available on the market. For now, you can try Stable Diffusion 3 through the Fireworks AI service, allowing you to generate only a few images before requiring payment. But, as with every version, SD’s third major instalment will soon be available for everybody to run on their own machines, offline and locally, without any limits. It premiered on 12th June, 2024, but the community gathered around the AI image generation still needs some time to adjust to it.
What do you need to run Stable Diffusion?
Think of Stable Diffusion as a car engine. It’s virtually useless on its own unless used as part of a larger machine. You interact with an engine mainly using a clutch, accelerator, and brake. For Stable Diffusion, you’ll need a GUI. Standing for a Graphical User Interface, this kind of software will allow you to control your local SD instance. And, like with the cars, there are many GUIs to choose from. For the purposes of this article, we’ll focus on the 3 arguably most popular ones: ComfyUI, Automatic1111 and Fooocus.
Beware, though—learning about the possibilities of AI image generation can be a dangerous hobby. Once you catch the bug, you may find yourself in a rabbit hole, constantly trying new things, improving your workflow, and basically turning yourself into a prompt engineer. While a fascinating hobby, it can consume a significant chunk of your free time. If you’re not intimidated and wish to dive in fully, read along, but don’t say we didn’t warn you!
ComfyUI
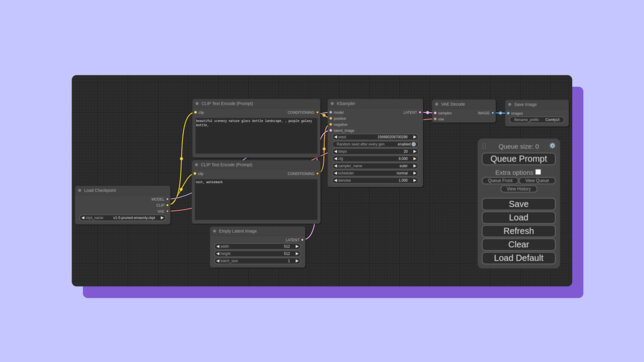
With ComfyUI, the sky is the limit. Its node-based design lets you see and tweak everything that affects the final outcome – your generated image. If the Stability Diffusion is an engine, ComfyUI is a transparent car hood. You can tweak almost everything and have a lot of control over the generation process. The drawback? It requires a lot of technical knowledge and research. Even by its looks, ComfyUI can scare off less experienced AI enthusiasts. However, with enough dedication, ComfyUI can reward you with possibly the most refined custom images, which also generate the fastest.
Automatic1111
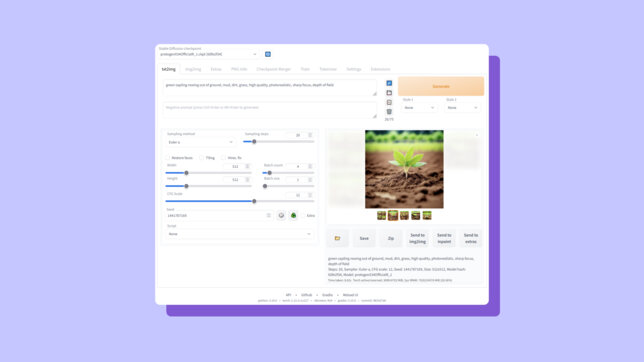
Stable Diffusion WebUI (also called Automatic1111 or A1111 for short) is a little less robust than ComfyUI but still provides a wide variety of customisation options. With its numerous extensions and more user-centric approach, A1111 strikes a middle ground between complex and simple. It doesn’t let you disassemble your SD engine and put it back together, but fine-tuning is definitely possible. You can either use its most basic functionalities to get remarkable results or dive deeper and achieve something truly spectacular. If you want to test Stable Diffusion and its more advanced capabilities, like inpainting, img2img, or LORAs, but don’t want to get into the nuts and bolts of ComfyUI, then A1111 might be best for you.
Fooocus
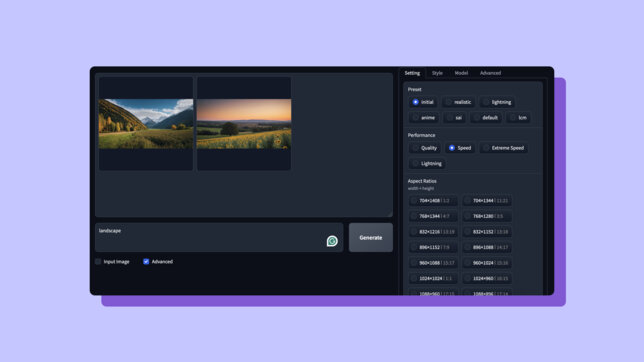
As its name implies, Fooocus (yes, spelt with three 'o's) takes a different approach. It strives to automate most of the tasks that need to be done manually in ComfyUI and A1111. With its minimalistic design, it comes out as a simple tool for achieving the desired results. But it doesn’t mean it lacks advanced functionalities. Fooocus lets you do many things that Automatic1111 is capable of but provides easy and foolproof access to the most important ones. That puts it in direct comparison to its subscription-based counterpart, MidJourney. Both are similarly easy to use. Acknowledging this, the creators of Fooocus have assembled a helpful guide on how to use it if you’re already familiar with MJ. In addition to ease of use, Fooocus is also very easy to install. And, perhaps most importantly, it doesn’t require you to know anything about prompt engineering – you can simply state what you want to create, and Fooocus will take care of the rest, transforming your request for Stable Diffusion digestion. This makes it an ideal candidate for your first Stable Diffusion GUI.
Using Fooocus on a Windows machine
Installing Fooocus on Windows is pretty straightforward. You can just visit the project’s GitHub page and follow the installation instructions. If you’re a Mac enthusiast, things get much more complicated, involving using Terminal and manually installing Anaconda and PyTorch. If these names don’t ring a bell, you’d better off skipping Fooocus for the time being. Moreover, the initial Mac configuration of Fooocus leaves much to be desired. It’s really slow, even on modern machines utilising Apple’s silicon (M1-M3 processors). You can optimise it and get much better results, but that’s not easy for somebody who just wants to try image generation at home.
Fooocus – first launch
When you open Fooocus for the first time, you will see a command prompt window with a lot of information that may be difficult to understand. Luckily, your web browser should also open, displaying the main Fooocus interface. It's important not to close the command prompt window while working with Fooocus, as it will cause an error, and you’ll have to start over. However, you can safely minimise it.
The tool will then proceed to download its main model, and you’ll be able to see the progress in the same command prompt window we’ve just discussed. By default, Fooocus uses Juggernaut XL, a model based on the Stablle Diffusion version called “XL,” the SD3 predecessor. The choice is understandable, as Juggernaut is very versatile and capable of outputting many different image styles. If you wish to use a different model, you can find many of them on Hugging Face. Just download any model you want and put it into your Fooocus/models folder. However, for now, the default model will be more than enough.
How to write prompts for Fooocus?
You can start typing your prompt as soon as the download is completed. You don’t need to try to “talk” to the Stable Diffusion in any specific way. Fooocus will take care of it, transforming your prompt in the most suitable way. But the real magic happens when you tick the “Advanced” option. You’ll get access to various presets, resolutions and styles. Using some of them (like the “realistic” preset) will cause Fooocus to download more of the required assets, so make sure your PC’s hard drive isn’t already full. If you want to try literally everything, about 20-30GB should be sufficient. Once you go to the „Style” tab, you can mix and match them, getting different results with the same prompt. There’s even a handy style reference sheet so you can pick and choose the one you like the most.
Tips on using Fooocus
To get the most out of Fooocus, keep the “Advanced” box ticked. This way, you’ll get access to 4 tabs filled with options you can experiment with. They’ll enable you to tweak some essential factors of your future creations. Most of them are available from the first tab, “Setting”:
- Aspect ratio: choosing a different aspect ratio might get you wildly different results! It’s important to note that this setting doesn’t only affect the measurements of the image but also the contents of it. That’s right, if you choose a wider picture, Stable Diffusion can create better landscapes, but the portraits are best with their height greater than width.
- Image number: also called a batch. By default, Fooocus creates 2 images in a batch, but you can increase this number to 32 (although it might require a NASA hardware). 1 is optimal for testing your prompts, but once that’s sorted, you can set it to 4 to get images a little bit faster than in the same number of consecutive generations.
- Negative prompt: did you encounter a situation where you specifically prompted DALL-E or MidJourney NOT to include something only to get MORE of it? A negative prompt solves that issue. You can type everything you don’t want on your image inside this box and enjoy fantasy-style portraits without making every character a pointy-eared elf (sic!).
- Seed: if you like an image and want to generate more variations of the exact same composition, untick the “Random” box at the bottom of the “Setting” tab. This way, you’ll get access to a seed number. Keep it consistent and only tweak your prompt to generate an altered image that retains the same “spirit” as the original one. It’s advised to keep the image number (batch) to 1 if you want the most similar outcome. This option is especially useful if you like the generated image but want to make only small adjustments.
- Guidance scale: to tweak this option, we’ll switch to the “Advanced” tab. If you found Foocus following your prompt too loosely, increase the guidance scale. If you want the generation to be more creative, decrease it. Setting it to “0” makes the tool completely ignore your prompt and generate something fully random.
That covers the most basic usage of Fooocus, but this tool is much more powerful. You can guide your generation by prompting an image instead of text (or combining them), replace the parts of the image using inpainting, or even inject some LoRAs that can further fine-tune your Stable Diffusion instance. Happy generating!


